Tableau Hold ’em — Part 2 — The Flop Card 2

Featured

Remember the need we are trying to answer is: “I want to know if I should bet or not!” 


Easiest solution is a YES/NO output, but really?


Welcome to Part 2:

We will

Import your table to Tableau

Map coordinates


Wait! What?

Yes Tableau has a nifty X/Y method that allows you to map out your image and it is a must for this process.

Be sure you have saved your Excel Poker Table as a png ( you can use the Windows Snipping Tool)


YouTube walk-through

1 Create a data set in Excel that you can reference — 3 columns

  • Position
  • X
  • Y

Position x y table

2 Open the Poker Table in Paint and look at the properties

the pile4

3 Copy the Width and Height in pixels and enter into Excel

Mapping size


Save the Excel file so it can be used as a Tableau Data Source

4 Connect to that data source

connect

5 Open a new worksheet and go to the Map tab at the top of the screen

Select Background images

Mapping Menu.png

6 Add your image

Table image import steps.PNG

7 Place the X/Y pixel counts into the image as X = the right most position and Y = the top most position

mapped x y

8 Create a cross tab with X as column and Y as rows

Things to consider:

In Map >> Background Images be sure you have “Always show Entire Image” selected

Be sure you select “X” and “Y”  when you enter your data

You will now see your Texas Hold ’em table

imported table.PNG

You can hide the headers to make a clean worksheet

Hide Headers.PNG

Up next –> Tableau Hold ’em Part 3


Previous steps:

https://excelirate.wordpress.com/2017/09/05/tableau-holdem-series/

https://excelirate.wordpress.com/2017/09/18/tableau-hold-em-part-1-the-flop-card-1/


VBA To publish a Batch File from MS Excel

In a previous post I described how to set up a batch file to create a list of files in a directory, specifically MS Excel files.

Sample Excel file with VBA in it.
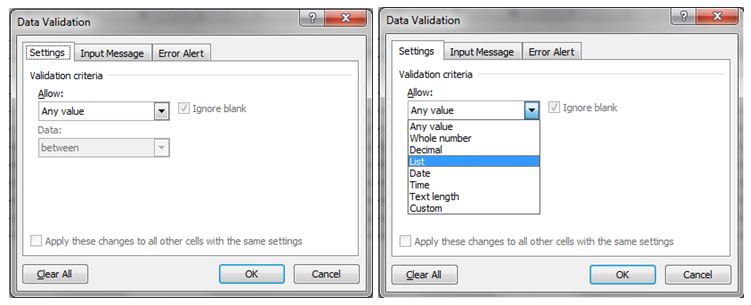
Question:

Have you ever wanted to bring the data from a set of standardized files into one file using automation?

If so, this blog represents step 2—generating the list remotely. Refer to my previous post to learn how the batch file works.

Tools: MS Excel, MS Windows

Fast Answer–MS Excel VBA Code:

Sub Build_Bat()
'
'''''''''''''''''''''''''''''''''''''''''''''''''''''''''''''''''''''''''''''''''''''''''''''''''''''''''''''''''''''''''
'
' Build_Bat generates a batch file
'
'''''''''''''''''''''''''''''''''''''''''''''''''''''''''''''''''''''''''''''''''''''''''''''''''''''''''''''''''''''''''''

Dim FileNum As Integer
Dim Filepath As String
Dim Folder As String

Filepath = <<Enter your file path here with a closing \>> & "filelist.bat"

'’’’’’’’’’’’’’’’’’’’’’’’’’’’’’’’’’’’’’’’’’’’’’’’’’’’’’’’’’’’’’’’’’’’’’’’’’’’’’’’’’’’’’’’’’’’’’’’’’’’’’’’’’’’’’’’’’’’’’’’’’’’’’’’’’’’’’
'
' Example: Filepath = "C:\Users\Alexander zbiciak\Batch Example\" & "filelist.bat"
'
'’’’’’’’’’’’’’’’’’’’’’’’’’’’’’’’’’’’’’’’’’’’’’’’’’’’’’’’’’’’’’’’’’’’’’’’’’’’’’’’’’’’’’’’’’’’’’’’’’’’’’’’’’’’’’’’’’’’’’’’’’’’’’’’’’’’’’’

'create spot for batch file

FileNum = FreeFile()

'open file

Open Filepath For Output As #FileNum

'write batch file

Print #FileNum, "pushd " & Folder
Print #FileNum, "filetorun -options"
Print #FileNum, "dir /b *.xls? > fileslist.txt"

Close #FileNum

End Sub

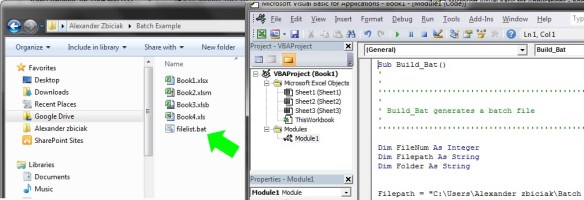
Before Macro is run:

After Macro is run:

How To:

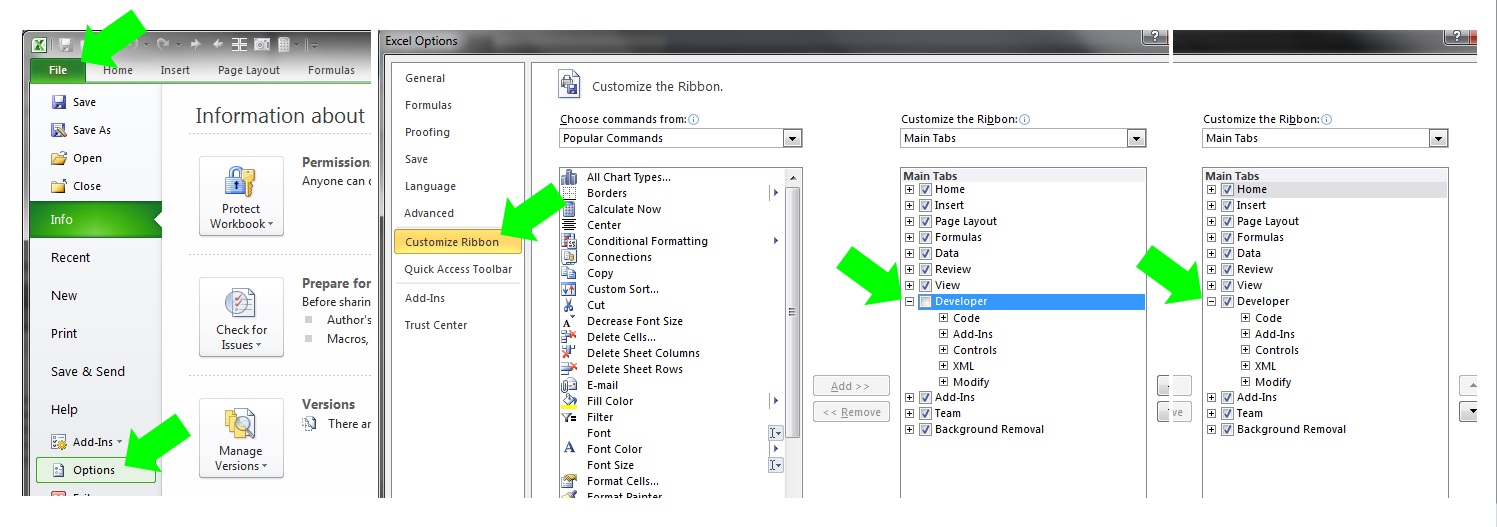
First open up Excel and be sure you have the developer tab enabled in your ribbon:

File >> Options >> Customize Ribbon >> Developer

ExcelBatch3

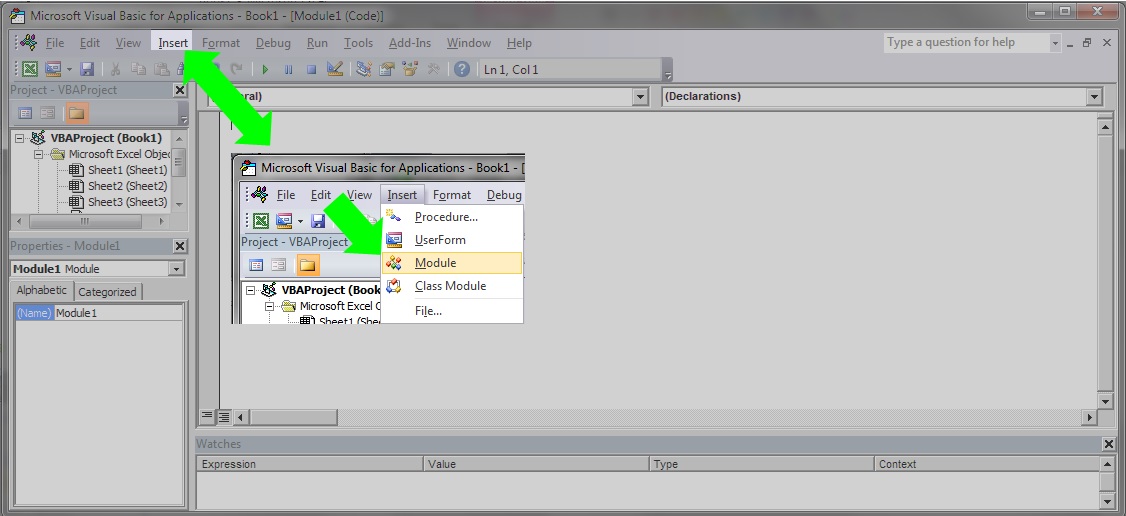
Select the Developer Tab and then the Visual Basic Icon to open your editor:

ExcelBatch4

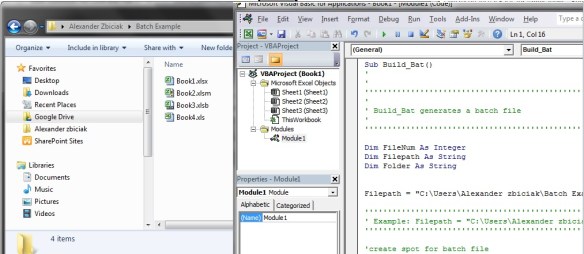
Inside the editor you will need to add a module if there are none or open one you want to add this code to:

ExcelBatch5

With your module open copy the code below and paste it in (be sure to change your file path):

Sub Build_Bat()
'
'''''''''''''''''''''''''''''''''''''''''''''''''''''''''''''''''''''''''''''''''''''''''''''''''''''''''''''''''''''''''
'
' Build_Bat generates a batch file
'
'''''''''''''''''''''''''''''''''''''''''''''''''''''''''''''''''''''''''''''''''''''''''''''''''''''''''''''''''''''''''''

Dim FileNum As Integer
Dim Filepath As String
Dim Folder As String

Filepath = <<Enter your file path here with a closing \>> & "filelist.bat"

'’’’’’’’’’’’’’’’’’’’’’’’’’’’’’’’’’’’’’’’’’’’’’’’’’’’’’’’’’’’’’’’’’’’’’’’’’’’’’’’’’’’’’’’’’’’’’’’’’’’’’’’’’’’’’’’’’’’’’’’’’’’’’’’’’’’’’
'
' Example: Filepath = "C:\Users\Alexander zbiciak\Batch Example\" & "filelist.bat"
'
'’’’’’’’’’’’’’’’’’’’’’’’’’’’’’’’’’’’’’’’’’’’’’’’’’’’’’’’’’’’’’’’’’’’’’’’’’’’’’’’’’’’’’’’’’’’’’’’’’’’’’’’’’’’’’’’’’’’’’’’’’’’’’’’’’’’’’’

'create spot for batch file

FileNum = FreeFile()

'open file

Open Filepath For Output As #FileNum

'write batch file

Print #FileNum, "pushd " & Folder
Print #FileNum, "filetorun -options"
Print #FileNum, "dir /b *.xls? > fileslist.txt"

Close #FileNum

End Sub

ExcelBatch6

Test your macro by opening the file path in the Windows file explorer. Leave this open so you can watch the VBA output:

ExcelBatch7

With the file explorer window to the side, place your cursor inside the VBA code and then click the play button:

ExcelBatch8

Congratulations—You have now published a batch file from MS Excel.

Vlookup: Learn it, Love it and Leave it… Part 2 Enhancements

In Part 2, I showed you how to add the dynamic aspects to a Vlookup formula, but we left a lot of room for error. In particular the user may enter data that cannot be found in the data. I showed how entering an “a” for item # failed, likewise the user may wish to enter January, not knowing or realizing Jan is the column header. Part 2 Enhancements shows you how to add validation rules to speed reporting by helping the user enter only what is needed.


Tools to be used: Data Validation.


First we want to be sure that the user only selects valid data.

To do this we will look at our two selections we made Item # and Month in cells C16 and D16. Select cell C16 and then go to:

Ribbon Data tab >> Data Validation >> Validation Criteria >> select List

Click on Data Validation to open the contextual/dialogue box for your inputs:

DataValidation

 In the dialogue box navigate to the Allow: box.

Use selection box by activating the drop down and then select List.

DataValidationList

In Source:  enter the limited range (array) that has all of your items.

Data Validation List Source

For this example we will use the data table itself. In more advanced files we would use a control table to limit our possible items from a master list.

We will enter: $A$3:$A$12.


Once you hit enter, the cell C16 will now show a drop down arrow allowing you to select only what is in the list you referenced.

Data Validated Cell


You can do the same for the Months by selecting cell D16 and applying the list limitation with the source set to $C$2:$N$2. You can either manually type this or select the range with your mouse. Use the Practice tab of the linked file to build your own.


Congratulations, you have now limited the user entries and also helped ensure they are selecting the right items. You are on your way to building reports.